- November 4, 2024
- Posted by: Amala Mala Rajesh Samuel Dharshini
- Category: Informatica
Introduction:
This blog provides a detailed step-by-step guide on configuring workflows within Cloud Data Governance and Catalog (CDGC). The document walks through creating an asset with workflow approval, focusing on configuring multi-step approval processes. It explains the creation and assignment of roles for approvers, adding stakeholders, sending approval tickets, ensuring a streamlined approval process for data quality rules and governance tasks.
Below are the prerequisites for creating workflow
Pre-requisite:
- Importing Workflow task using Bundles
- Configuring Workflow with Human Task
- Creating asset with workflow approval
1.Importing Workflow task using Bundles
Step1:
To create Bundles, Goto Administrator service and ‘Add on Bundles’ section and Available Bundles tab. There we may see different bundles, and Select Data Governance and Catalog workflow
Administrator -> Add on Bundles -> Available Bundles -> Data Governance and catalog Workflow Bundle
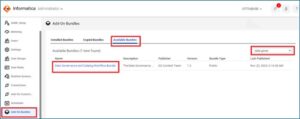
Once you click on selected bundles, there is “Copy Bundle Content To..” and we may browse and select folder location to copy inbuild bundles.
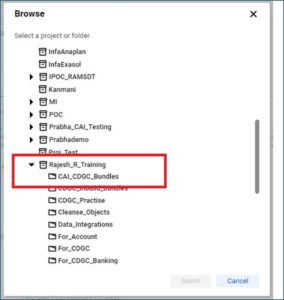
Here, we move bundles to our location. Now next
After copying bundles, it is like below.
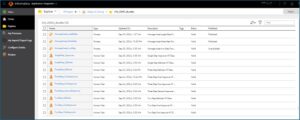
Now we select process and click process to configure.
2.1. Configuring Workflow
For Approvals using human tasks, here we need to select published process (Initially process not published). Click on ManageAsset_threeStep process to Design task flow publish.
Note: below example of Single step approver (ManageAsset_singleStep), to view overall flow of task.
Click ‘Start’ (1.) to view entire flow (for example here used 1step approver)
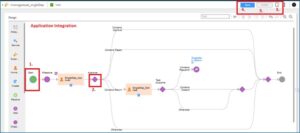
You get below screen if click on decision task (2.), there you find Action items from human task.
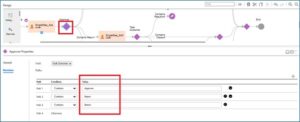
click validate button (3) to validate task flow, Save (4) and Publish (5).
- Creating workflow for an asset
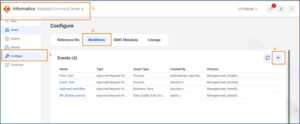
Step 1: Go to Metadata Command Center, click on Configure and click on Workflows tab then click add button (+) to create a workflow for asset.
MCC -> Configure -> Workflows -> Add button (+)
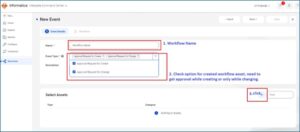
Step 2: On Event Details, enter name for workflow and select for which event this workflow is used for, then click ‘+’ button to select asset type.
Step 3: Here we are creating for ‘Data Quality Rule Occurrence’ asset and click ok.
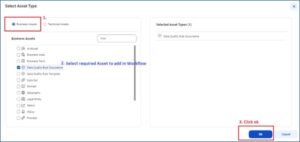
In this case, Business Asset was selected for workflow approvals, now which workflow type need to be configured. Ex: OneStep Approval, TwoStep Approval or ThreeStep Approval
Step 4:
Now click workflow tab.
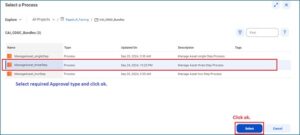
On workflow pane, select process we published in our location using browse button.

Note: here we have taken three step approval process from Bundles.
Step 5:
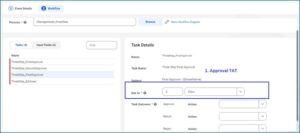
Once Selected our published taskflow, we get the below Screen.
- Due time to approve this asset
Step 6:
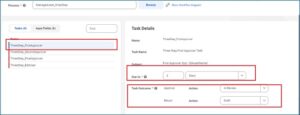
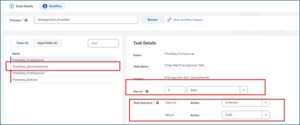
Let’s click on “ThreeStep_FirstApprover” and follow below changes. (in Tasks tab)
There we can configure due time and Task Outcome from human task.
For this we removed ‘Reject’ action in task Flow itself. If first approver approves, then
changes/creation need to be in review further approvals.
Click on ‘Input Fields’ tab and click on.
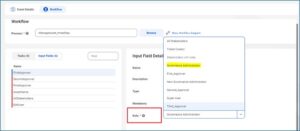
We can select role to approve ticket as first approver.
InputFields tab, click on FirstApprover to get Input Field Details.
Name, Description, Type and Mandatory tabs all have auto fill options. We need to select which role (that the approver must have this privilege to approve asset).
In our case, for first approver we given ‘Governance Administrator’ as first approver.
For second and third approver, we created separate roles, groups and users to approve.
Step 7:ThreeStep_SecondApprover
Now configure, three step second approver as like first. Click on Tasks tab and fill Due In and Task out come. For Second Approver also we removed reject button.
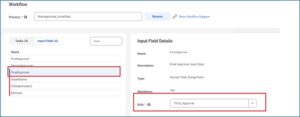
In Second Approver, Input Field Details pane select role as Second_Approver.
Note: here we have created Second_Approver using Administrator Service. If you have a different role, you may use it.
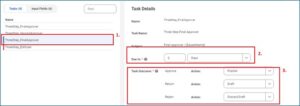
Step 8: ThreeStep_FinalApprover
Three step final approver, Click on Tasks tab and fill Due In and Task out come. For Final Approver we have all buttons. In Task outcome, for Reject action you may discard draft for asset. For Return action, it goes to previous approver again (Second Approver). Approve action to publish asset.
In Input Fields tab, we have third_approver Role. The final approver must have ‘Third_Approver’ role to approve this asset.
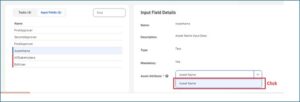
Step 9: AssetName
AssetName available only for Input Field Details tab, we may click Asset Attribute column and click drop down and click Asset Name.
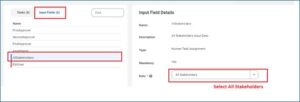
Step 10: AllStakeholders
For AllStakeholders, click role as All Stakeholders
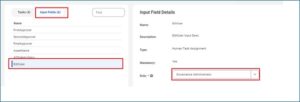
Step11: EditUser
For EditUser, select Role as Governance Administrator in drop down tab.
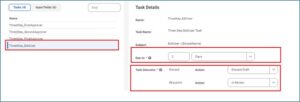
In Task tab, for ThreeStep_EditUser give Due in and Task Outcome values.
Now the configuration of three step approver for Data Quality Rule Occurrence has been done and hit save button on the top right corner.
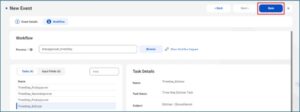
You may see this newly created workflow in Workflow tab.
MCC -> Configure -> Workflows
Creating Asset: (In our case we are taking Rule Occurrence)
Step 1: Now go to Data Governance and Catalog service and create new Business Rules for Data Quality Rule Occurrence and click Create Button.
Data Governance and Catalog -> New -> Business Rules -> Data Quality Rule Occurrence
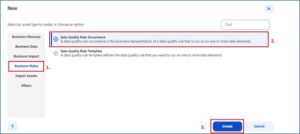
Step 2: Fill the mandatory fields to create Rule Occurrence. Name and Primary Data Element.
(Select Catalog Source -> DataSet -> DataElement)
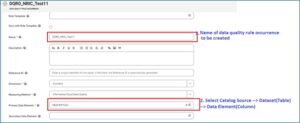
Step 3: For Technical Rule Reference, you may add an existing rule using Pick an existing rule radio button to select existing rule or Create a Rule (Using CLAIRE we may create an rule in run time). We are using one of our existing rule.
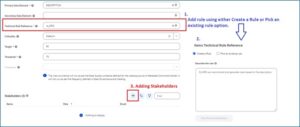
Then we need to add Stakeholders.
Step 4: As per our workflow, we need to add Stakeholders/Groups as per design of workflow.
We created User Groups for Approvals with different roles using Administrator Service. FirstApproverGroups we added users with Governance Administrator role, SecondApproverGroup with Second_Approver role and same for ThirdApproverGroup with Third_Approver role.
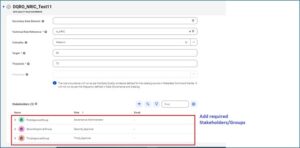
As per our workflow, Input Fields -> Input Field Details -> Role, we need to assign Stakeholders/Groups.
In this workflow case, we need one Data Governance role, one Second_Approver role and one Third_Approver role.
For practice you may use all as ‘Governance Administrator’ role, but same user able to approve up to final step.
Step 5: Creating New ticket for sending Approval
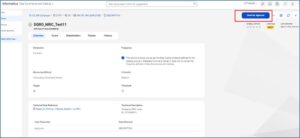
After creating Rule Occurrence hit ‘Send for Approval’ button on top right corner.
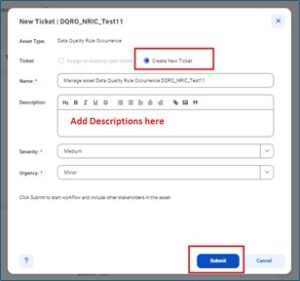
Now in below pop-up window, you may select Severity and Urgency to Approvers and hit Submit button.
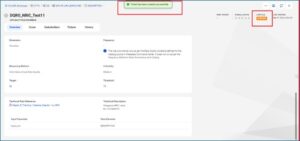
Now ticket has been created successfully.
First Approver: Claim
Now login as First Approver (User with Governance Administrator, make sure you added this user/user group in Stakeholder last step of creating this asset). You may get this asset via mail or after login a user with this role privilege click on Manage Ticket which is next to your organization name.
For First Approver Group, two users added login any user and you may hit Claim/Start and make this ticket assigned to you and then for your action, Approve or Return.
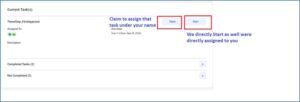
As per task flow design, after Approval it goes to next approver else stay in draft.
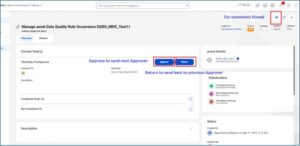
SECOND APPROVER: Login as any user in Second Approver Group, get ticket using ticket manager then claim/start this ticket -> Approve for Second approver.
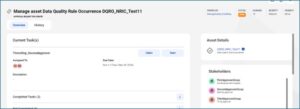
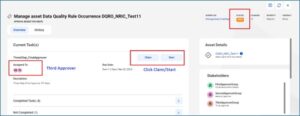
THIRD APPROVER: Login as any user in Third Approver Group, get ticket using ticket manager then claim/start this ticket à Approve for Final approver.
As per task flow design, in the final approver we have Reject option as well with which the final approver can discard this asset. Let’s go with the case as Approve.
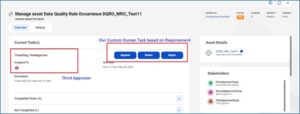
Finally, after approval this ticket is resolved.
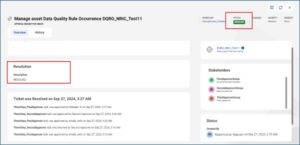
You may see Run Now button on the top right corner. This shows to Final approver or if you added you as Stakeholder while creating this asset you can run this Rule Occurrence Asset.

To create an asset using workflow approval method is done.
Conclusion
Configuring workflows in CDGC for asset approval enables a structured and efficient governance process. By following this guide, users can create workflows that ensure assets undergo a multi-step approval process, enhancing data governance and quality control. The ability to assign roles and tasks to different approvers ensures that data assets are reviewed and approved by the right stakeholders, fostering accountability and compliance.
Please reach out to us for your Informatica solution needs. We are an Informatica Platinum Partner with extensive experience with Informatica implementations and data integration.

